Give your UIViews and UIButtons some rounded edges and a shadow!
Somehow, making a button rounded, and then adding a shadow to it, seems to be more difficult than it should. Here's how to do it in Swift!

Update: the follow-up, on how to animate our buttons when users interact with them is available here.
This sounds simple, right? All we have to do is...
func makeRoundedAndShadowed(view: UIView) {
	view.layer.cornerRadius = 20
}func makeRoundedAndShadowed(view: UIView) {
view.layer.cornerRadius = 20
view.layer.masksToBounds = true
}func makeRoundedAndShadowed(view: UIView) {
view.layer.cornerRadius = 20
view.layer.masksToBounds = true
view.layer.shadowColor = UIColor.darkGray.cgColor
}func makeRoundedAndShadowed(view: UIView) {
view.layer.cornerRadius = 20
view.layer.masksToBounds = true
view.layer.shadowColor = UIColor.darkGray.cgColor
view.layer.shadowOffset = CGSize(width: 2.0, height: 2.0)
}func makeRoundedAndShadowed(view: UIView) {
view.layer.cornerRadius = 20
view.layer.masksToBounds = true
view.layer.shadowColor = UIColor.darkGray.cgColor
view.layer.shadowOffset = CGSize(width: 2.0, height: 2.0)
view.layer.shadowOpacity = 0.4
}func makeRoundedAndShadowed(view: UIView) {
view.layer.cornerRadius = 20
view.layer.masksToBounds = true
view.layer.shadowColor = UIColor.darkGray.cgColor
view.layer.shadowOffset = CGSize(width: 2.0, height: 2.0)
view.layer.shadowOpacity = 0.4
view.layer.shadowRadius = 5.0
}... aaand we're done!
...
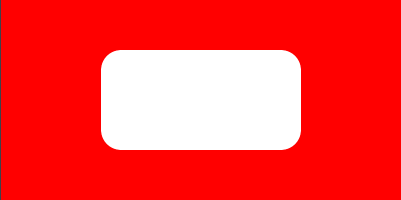
Or not. Where's our damn shadow?

The problem
The shadow is clipped. It's clipped because our layer "masksToBounds". But we need that for our view to have these rounded edges, right? What can we do? There has to be a way... right?
We're not the first ones to face this. Looking it up on Google, it appears to be quite an old question, and one that just keeps coming up. As you can see below:
- https://stackoverflow.com/questions/41346724/swift-apply-shadow-to-circular-button-on-click
- https://stackoverflow.com/questions/24644802/swift-problems-with-corner-radius-and-drop-shadow
- https://stackoverflow.com/questions/52786058/adding-shadow-layer-with-rounded-corners-on-custom-uibutton-subclass
- https://stackoverflow.com/questions/38251394/ios-button-with-round-corners-and-a-shadow
- https://stackoverflow.com/questions/4754392/uiview-with-rounded-corners-and-drop-shadow
- https://freakycoder.com/ios-notes-11-how-to-create-a-circle-button-with-shadow-9a9c902a3a56
 Jeroen de VrindCorey Walo
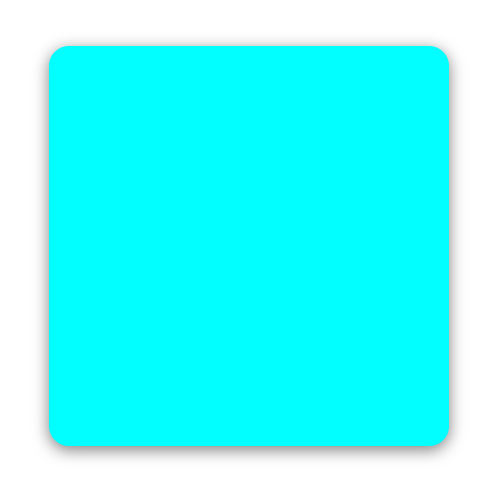
A (working) solution
If you look at some of them, you'll find a (working) solution. Using a second view, or a layer, depending on who you ask. In our case, we won't be making yet another view. Every problem isn't a nail, and an UIView a hammer isn't all we have in our toolkit. We'll use a layer. A CALayer (here's a nice short post on the difference between those two).
So we...
func makeRoundedAndShadowed(view: UIView) {
    let shadowLayer = CAShapeLayer()
}func makeRoundedAndShadowed(view: UIView) {
let shadowLayer = CAShapeLayer()
view.layer.cornerRadius = 20
}func makeRoundedAndShadowed(view: UIView) {
let shadowLayer = CAShapeLayer()
view.layer.cornerRadius = 20
shadowLayer.path = UIBezierPath(roundedRect: view.bounds,
cornerRadius: view.layer.cornerRadius).cgPath
}func makeRoundedAndShadowed(view: UIView) {
let shadowLayer = CAShapeLayer()
view.layer.cornerRadius = 20
shadowLayer.path = UIBezierPath(roundedRect: view.bounds,
cornerRadius: view.layer.cornerRadius).cgPath
shadowLayer.fillColor = view.backgroundColor?.cgColor
}func makeRoundedAndShadowed(view: UIView) {
let shadowLayer = CAShapeLayer()
view.layer.cornerRadius = view.frame.height / 2
shadowLayer.path = UIBezierPath(roundedRect: view.bounds,
cornerRadius: view.layer.cornerRadius).cgPath
shadowLayer.fillColor = view.backgroundColor?.cgColor
shadowLayer.shadowColor = UIColor.darkGray.cgColor
}func makeRoundedAndShadowed(view: UIView) {
let shadowLayer = CAShapeLayer()
view.layer.cornerRadius = 20
shadowLayer.path = UIBezierPath(roundedRect: view.bounds,
cornerRadius: view.layer.cornerRadius).cgPath
shadowLayer.fillColor = view.backgroundColor?.cgColor
shadowLayer.shadowColor = UIColor.darkGray.cgColor
shadowLayer.shadowOffset = CGSize(width: 2.0, height: 2.0)
shadowLayer.shadowOpacity = 0.4
shadowLayer.shadowRadius = 5.0
view.layer.insertSublayer(shadowLayer, at: 0)
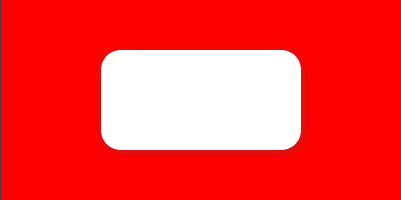
}And low and behold... rounded corners and a shadow!

Improving Performance (Update!)
Following the publication of this post, I've been told by Julien Sagot on Twitter that shadows are really expensive and I should really look into CALayer's shadowPath. So here's the actual end result :-):
func makeRoundedAndShadowed(view: UIView) {
    let shadowLayer = CAShapeLayer()

    view.layer.cornerRadius = 20
    shadowLayer.path = UIBezierPath(roundedRect: view.bounds,
                                    cornerRadius: view.layer.cornerRadius).cgPath
    shadowLayer.shadowPath = shadowLayer.path
    shadowLayer.fillColor = view.backgroundColor?.cgColor
    shadowLayer.shadowColor = UIColor.darkGray.cgColor
    shadowLayer.shadowOffset = CGSize(width: 2.0, height: 2.0)
    shadowLayer.shadowOpacity = 0.4
    shadowLayer.shadowRadius = 5.0
    view.layer.insertSublayer(shadowLayer, at: 0)
}
Reusability
Now, putting this function in our UIViewController isn't reusable. So let's do ourselves one better. No, not by using an UIView extension, because those can't hold stored properties and do tend to lead to messier code. No; we'll use a protocol, and classes!
Here's the protocol:
protocol ShadowableRoundableView {

    var cornerRadius: CGFloat { get set }
    var shadowColor: UIColor { get set }
    var shadowOffsetWidth: CGFloat { get set }
    var shadowOffsetHeight: CGFloat { get set }
    var shadowOpacity: Float { get set }
    var shadowRadius: CGFloat { get set }

    var shadowLayer: CAShapeLayer { get }

    func setCornerRadiusAndShadow()
}

extension ShadowableRoundableView where Self: UIView {
    func setCornerRadiusAndShadow() {
        layer.cornerRadius = cornerRadius
        shadowLayer.path = UIBezierPath(roundedRect: bounds,
                                            cornerRadius: cornerRadius ).cgPath
        shadowLayer.fillColor = backgroundColor?.cgColor
        shadowLayer.shadowColor = shadowColor.cgColor
        shadowLayer.shadowPath = shadowLayer.path
        shadowLayer.shadowOffset = CGSize(width: shadowOffsetWidth ,
                                          height: shadowOffsetHeight )
        shadowLayer.shadowOpacity = shadowOpacity
        shadowLayer.shadowRadius = shadowRadius
    }
}And here's our @IBDesignable custom UIView!
import UIKit


@IBDesignable
class OurCustomView: UIView, ShadowableRoundableView {

    @IBInspectable var cornerRadius: CGFloat = 0 {
        didSet {
            self.setNeedsLayout()
        }
    }

    @IBInspectable var shadowColor: UIColor = UIColor.darkGray {
        didSet {
            self.setNeedsLayout()
        }
    }

    @IBInspectable var shadowOffsetWidth: CGFloat = 3 {
        didSet {
            self.setNeedsLayout()
        }
    }


    @IBInspectable var shadowOffsetHeight: CGFloat = 3 {
        didSet {
            self.setNeedsLayout()
        }
    }


    @IBInspectable var shadowOpacity: Float = 0.4 {
        didSet {
            self.setNeedsLayout()
        }
    }


    @IBInspectable var shadowRadius: CGFloat = 4 {
        didSet {
            self.setNeedsLayout()
        }
    }

    private(set) lazy var shadowLayer: CAShapeLayer = {
        let layer = CAShapeLayer()
        self.layer.insertSublayer(layer, at: 0)
        self.setNeedsLayout()
        return layer
    }()

    override func layoutSubviews() {
        super.layoutSubviews()
        self.setCornerRadiusAndShadow()
    }
}If you need to make it a button, just replace UIView with UIButton and you'll be set. Wish we could have done more with the protocol, but that's the way it seems to be.
And if you want to make even better buttons, with neat animations, check out my new post!

Epilogue

If you have any suggestion on how to improve on this, or any question, do let me know on Twitter! I'll gladly improve upon it, and do my best to answer any and all questions. I also want to thank all those who did reach out with some questions and suggestions. I really appreciated it and am glad I could help!
And if you want to improve your buttons with animations, you can find the follow-up here!
That being said, thank you for reading, and have a great, beautiful day!


Comments ()