Use Cognito Federated Identities to authorize API Gateway access... and test it without an SDK!
You're building a Serverless microservice on AWS, authenticated via Cognito Federated Identity, and would like to test it? Read along!

You're building a serverless microservice, want to use Cognito Federated Identity as your API Gateway authorizer, but after a few hours scouring the AWS documentation, Google and StackOverflow (nope, wrong Cognito) you still haven't found how to make a simple REST API call to authenticate yourself, be able to build a collection for your webservice and maybe, just maybe, test your endpoints using curl, Postman or Paw?
I've been there too, and right now I must have about 50 or 60 tabs open in my browser, full of everything but what I was looking for: a damn endpoint for Cognito Federated Identity Pools. AWS' own documentation especially (and they know it) wasn't of any help here (seriously, Amazon, Host: <endpoint> ?)

Let's get to work. We'll setup a Cognito Federated Identity with unauthenticated users, an example serverless micro-service to test everything, and finish off by building a Postman / Paw collection to reference all these endpoints. And if you're nice, I'll even tell you how I found the proper endpoint URLs 😉 (hint: debug can't hold his liquor).
Setup your Cognito Federated Identity
Head to you aws console, and access the Amazon Cognito console
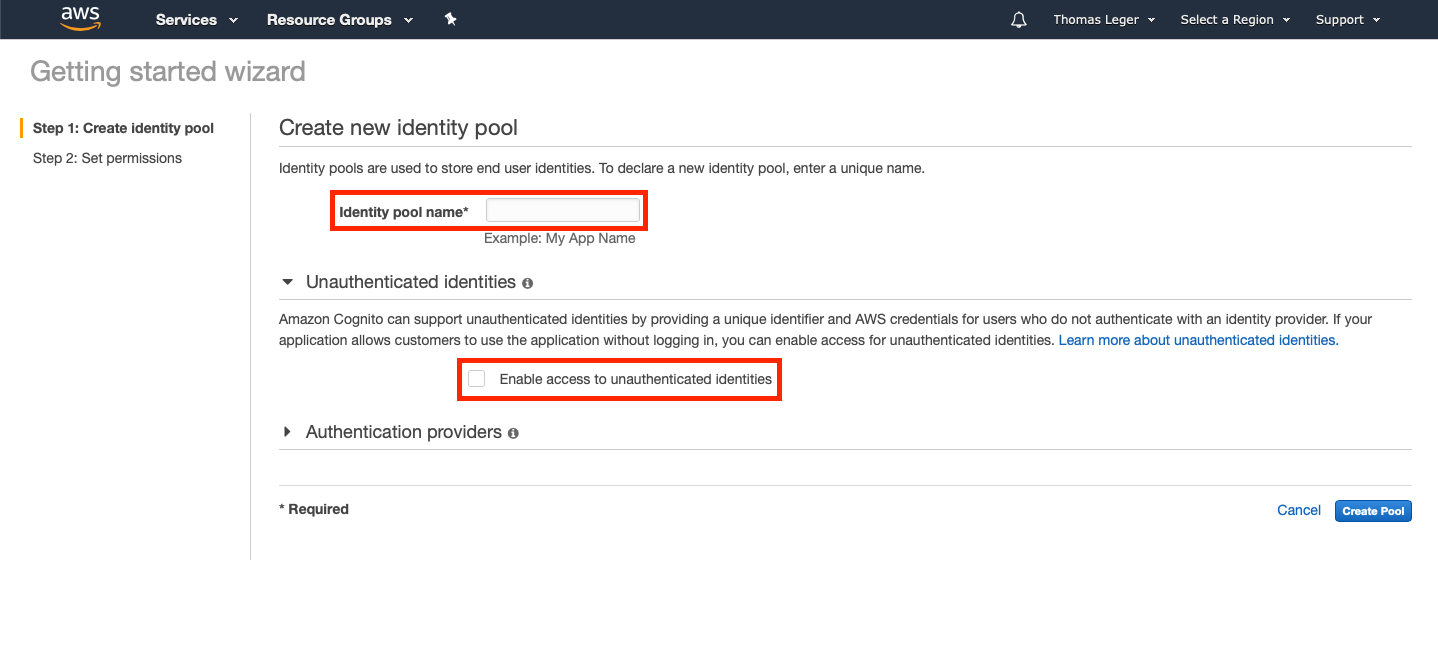
Pick Manage Identity Pools. If you don't already have an Identity Pool it'll open the "Getting started wizard". Pick a an identity pool name, and enable access to unauthenticated identities. Authentication providers don't really matter for this example since we'll only use unauthenticated access. Create the pool!
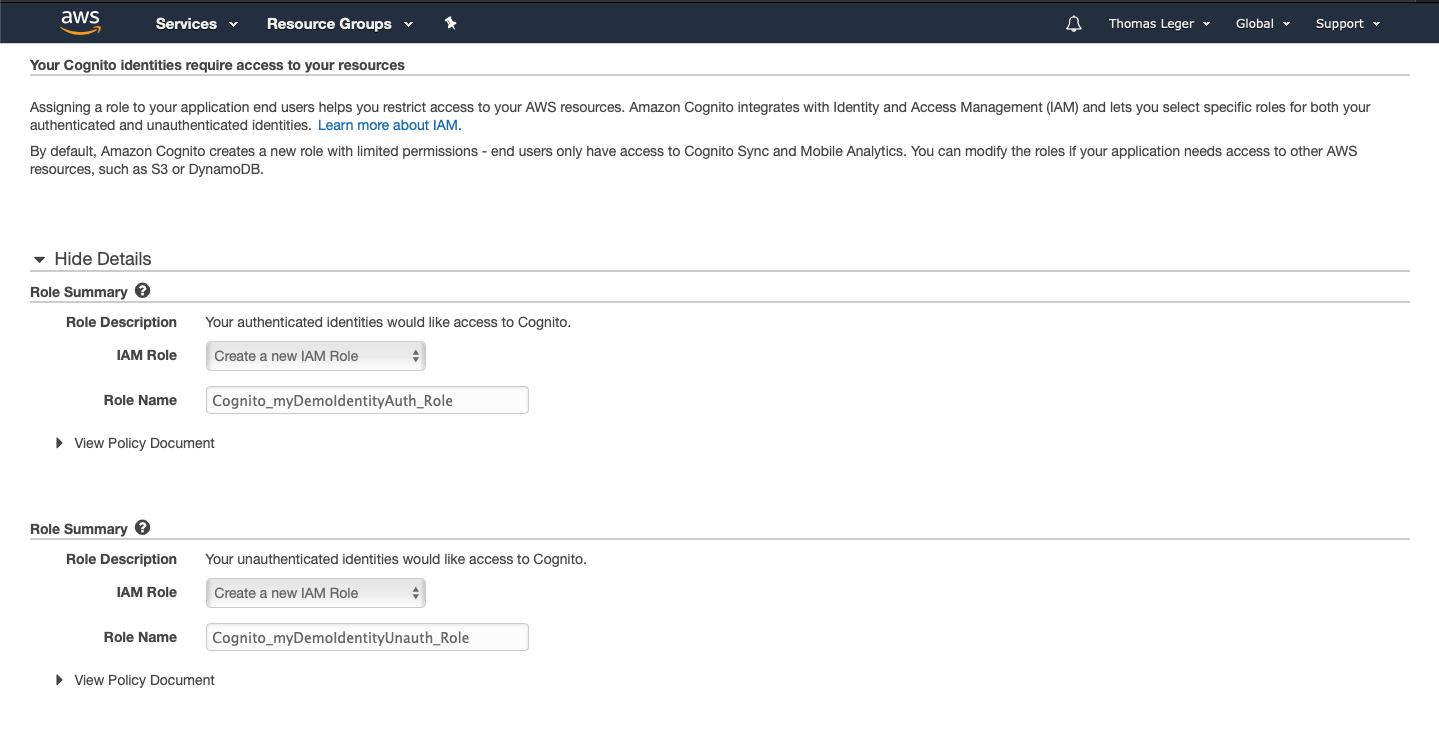
Final step, the permissions! Leave the default parameters. The wizard will create an authenticated and unauthenticated IAM Role for your Identity Pool. Write down the unauth role's name; we'll need it later.
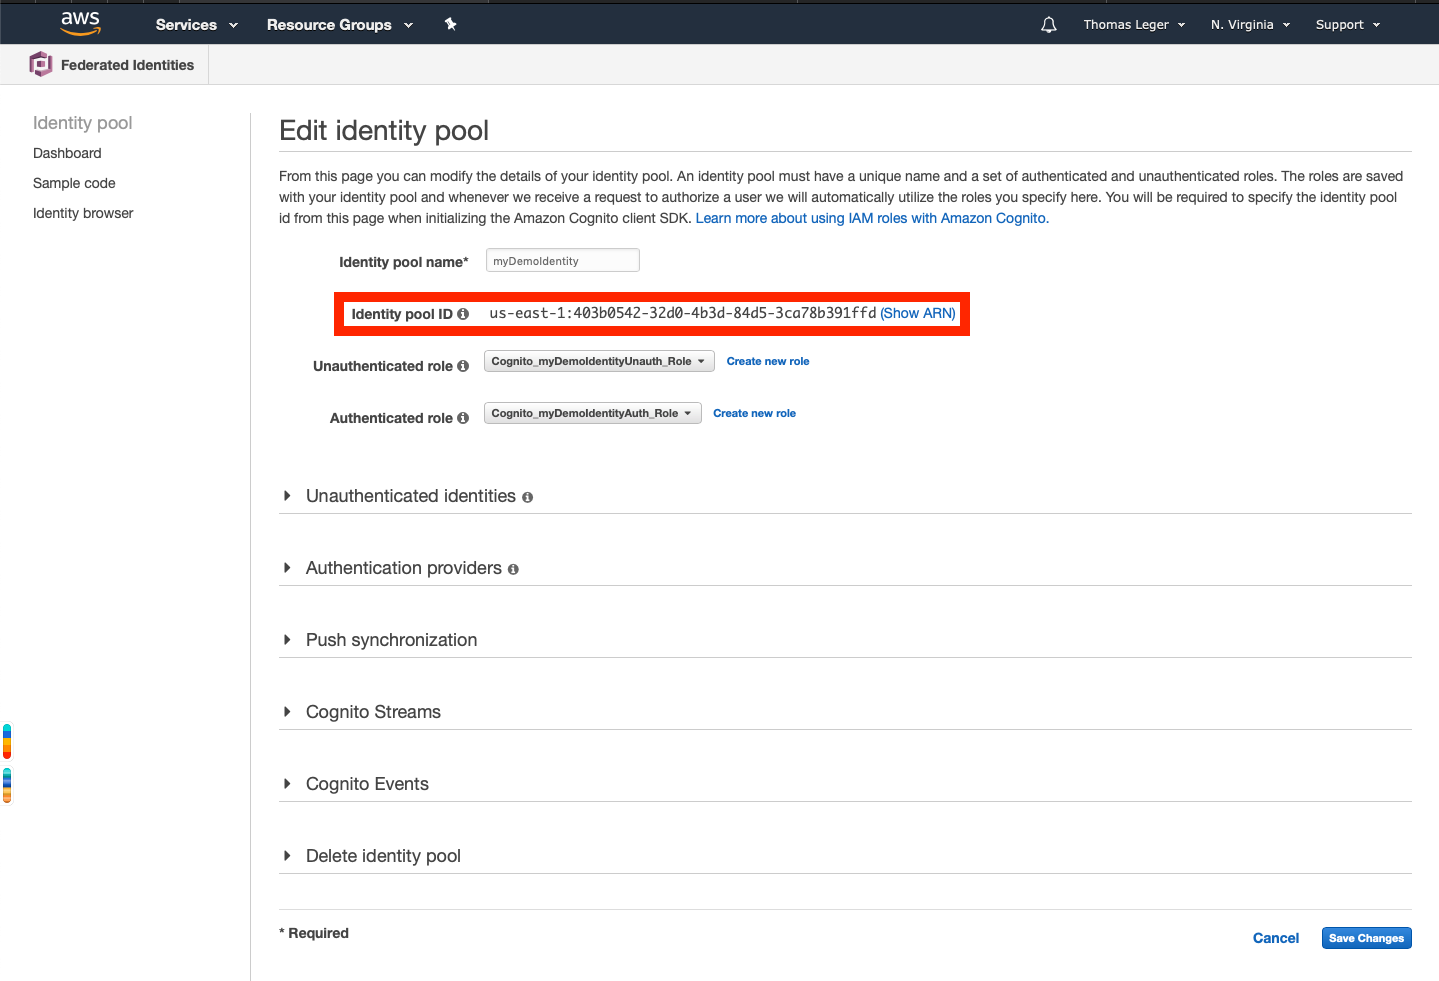
Go back to the Federated Identities console. Select your newly created identity pool, and click "Edit". Write down the Identity pool ID that will be displayed below the Identity pool name field.
Setup your serverless service
For this part, we'll use the Serverless framework's default aws template. My preference usually goes for typescript on Node.js, but for simplicity's sake I'll just go with the aws-nodejs template. If you haven't setup the Serverless framework before, follow their instructions here.
To create all the necessary files for this, just execute the following command in your project's folder:
sls create --template aws-nodejs
Now you should have both a handler.js and a serverless.ym file, as well as a node_modules folder. The serverless.yml should look like this:
# Welcome to Serverless!
#
# This file is the main config file for your service.
# It's very minimal at this point and uses default values.
# You can always add more config options for more control.
# We've included some commented out config examples here.
# Just uncomment any of them to get that config option.
#
# For full config options, check the docs:
#    docs.serverless.com
#
# Happy Coding!

service: aws-nodejs # NOTE: update this with your service name

# You can pin your service to only deploy with a specific Serverless version
# Check out our docs for more details
# frameworkVersion: "=X.X.X"

provider:
  name: aws
  runtime: nodejs8.10

# you can overwrite defaults here
#  stage: dev
#  region: us-east-1

# you can add statements to the Lambda function's IAM Role here
#  iamRoleStatements:
#    - Effect: "Allow"
#      Action:
#        - "s3:ListBucket"
#      Resource: { "Fn::Join" : ["", ["arn:aws:s3:::", { "Ref" : "ServerlessDeploymentBucket" } ] ]  }
#    - Effect: "Allow"
#      Action:
#        - "s3:PutObject"
#      Resource:
#        Fn::Join:
#          - ""
#          - - "arn:aws:s3:::"
#            - "Ref" : "ServerlessDeploymentBucket"
#            - "/*"

# you can define service wide environment variables here
#  environment:
#    variable1: value1

# you can add packaging information here
#package:
#  include:
#    - include-me.js
#    - include-me-dir/**
#  exclude:
#    - exclude-me.js
#    - exclude-me-dir/**

functions:
  hello:
    handler: handler.hello

#    The following are a few example events you can configure
#    NOTE: Please make sure to change your handler code to work with those events
#    Check the event documentation for details
#    events:
#      - http:
#          path: users/create
#          method: get
#      - s3: ${env:BUCKET}
#      - schedule: rate(10 minutes)
#      - sns: greeter-topic
#      - stream: arn:aws:dynamodb:region:XXXXXX:table/foo/stream/1970-01-01T00:00:00.000
#      - alexaSkill: amzn1.ask.skill.xx-xx-xx-xx
#      - alexaSmartHome: amzn1.ask.skill.xx-xx-xx-xx
#      - iot:
#          sql: "SELECT * FROM 'some_topic'"
#      - cloudwatchEvent:
#          event:
#            source:
#              - "aws.ec2"
#            detail-type:
#              - "EC2 Instance State-change Notification"
#            detail:
#              state:
#                - pending
#      - cloudwatchLog: '/aws/lambda/hello'
#      - cognitoUserPool:
#          pool: MyUserPool
#          trigger: PreSignUp

#    Define function environment variables here
#    environment:
#      variable2: value2

# you can add CloudFormation resource templates here
#resources:
#  Resources:
#    NewResource:
#      Type: AWS::S3::Bucket
#      Properties:
#        BucketName: my-new-bucket
#  Outputs:
#     NewOutput:
#       Description: "Description for the output"
#       Value: "Some output value"
Remove all the useless commented clutter, rename the service and it'll look like that:
service: aws-nodejs-demo

provider:
  name: aws
  runtime: nodejs8.10

functions:
  hello:
    handler: handler.hello
Much better. Let's add an IAM authorizer to your hello function
service: aws-nodejs-demo

provider:
  name: aws
  runtime: nodejs8.10

service: aws-nodejs-demo

provider:
  name: aws
  runtime: nodejs8.10

functions:
  hello:
    handler: handler.hello
    events:
      - http:
          path: hello
          method: get
          authorizer:
          type: aws_iam
Deploy your service
Quite a simple one: just run sls deploy. It'll run, and the end result should be similar to this:
Service Information
service: aws-nodejs-demo
stage: dev
region: us-east-1
stack: aws-nodejs-demo-dev
api keys:
  None
endpoints:
  GET - https://w93r25kdl0.execute-api.us-east-1.amazonaws.com/dev/hello
functions:
  hello: aws-nodejs-demo-dev-hello
layers:
  None
Write down the enpoint's url.
If you've setup the framework correctly, that's it. If the deploy did succeed but the output is empty, double check your serverless.yml, including the indentation. It's YAML.
Service Information
service: aws-nodejs-demo
stage: dev
region: us-east-1
stack: aws-nodejs-demo-dev
api keys:
  None
endpoints:
  None
functions:
  None
layers:
  None
Update your Identity Pool's unauth role
Remember the Federated Identity Pool we created earlier? Still have the unauthenticated role's name written down? Ok, head to the AWS console, and access the IAM service's dashboard.
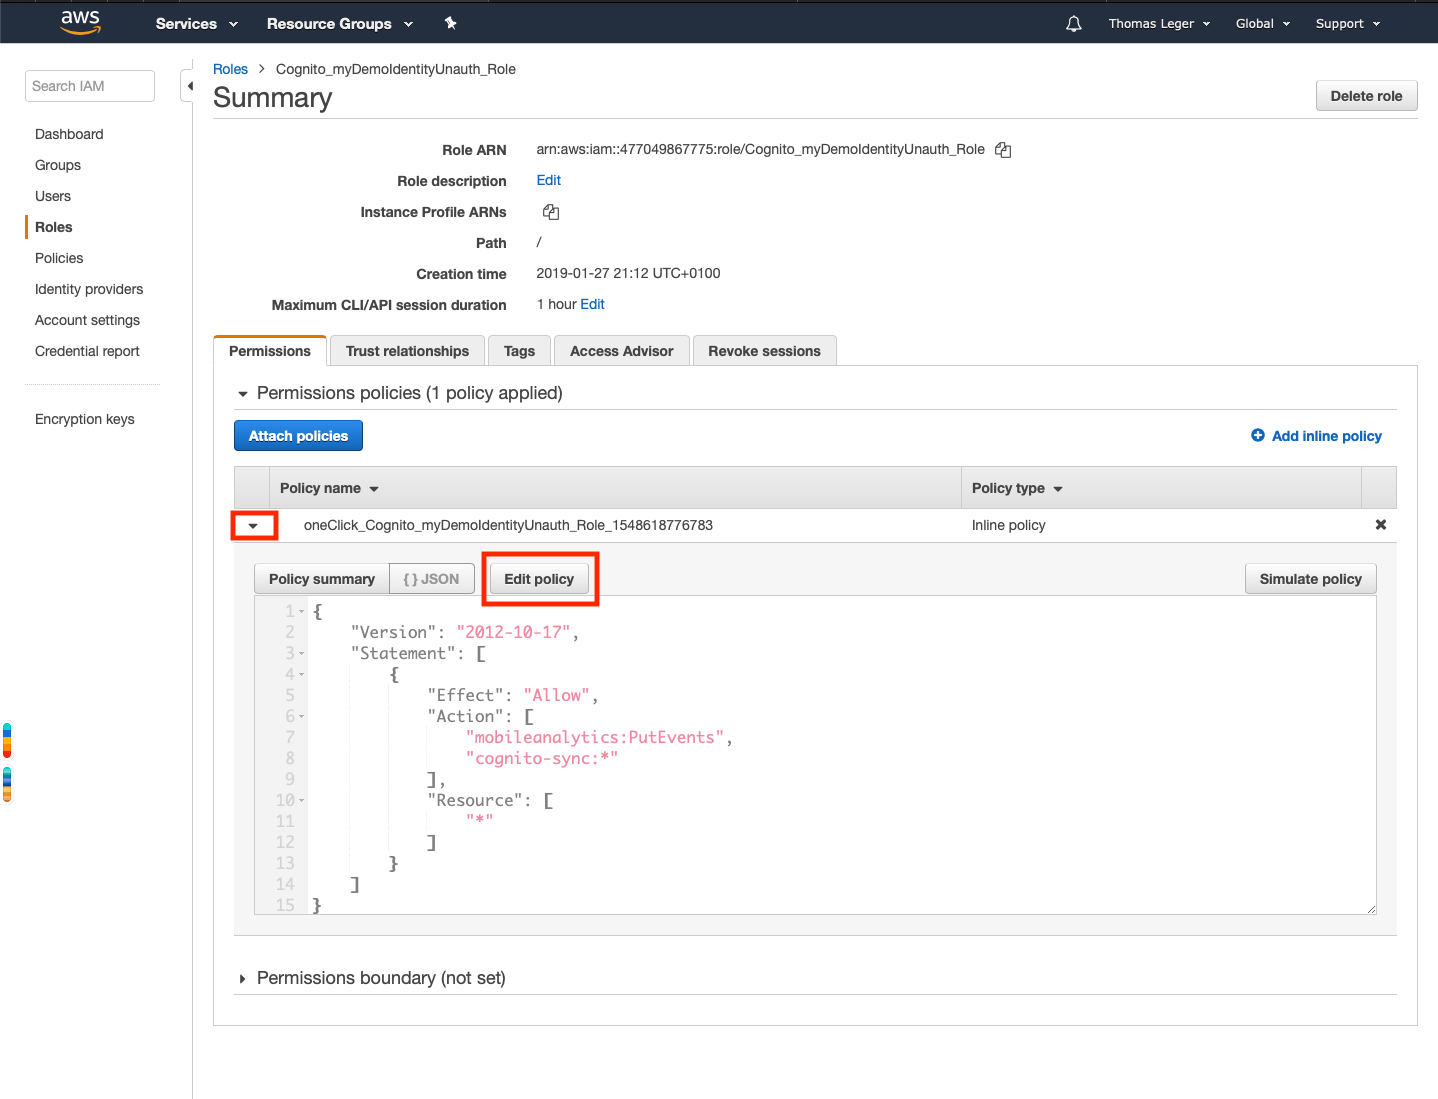
Go to Roles, and open the IAM Cognito Unauthenticated role we created earlier (and who's name you wrote down). It'll take you the role's summary.

Deploy the role's policy by clicking the arrow next to it's name, and click 'Edit Policy'
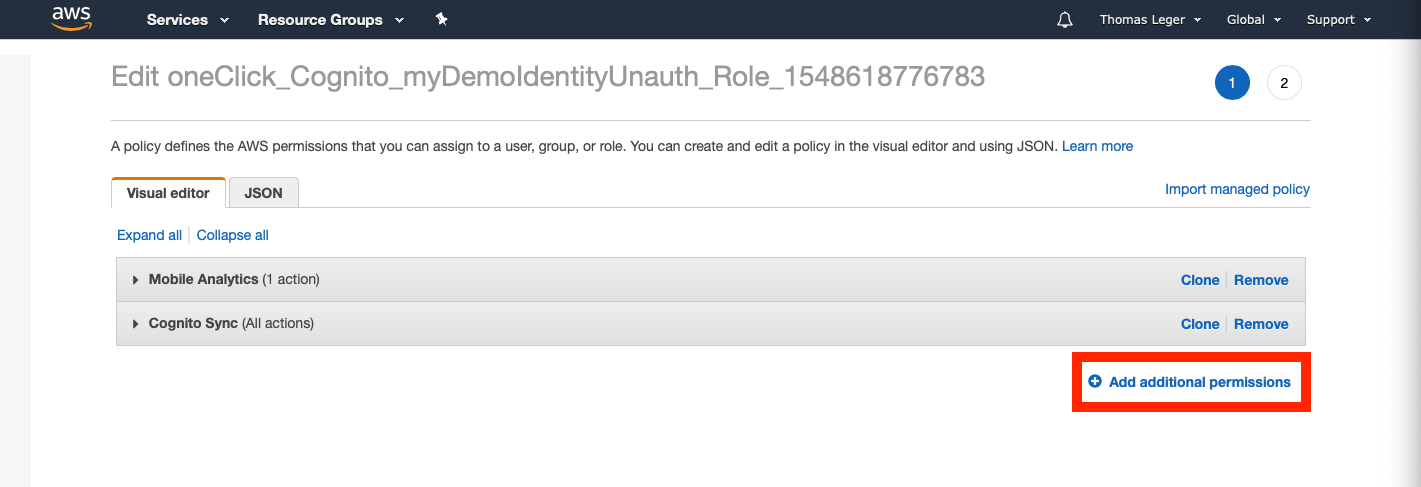
Add additional permissions to the policy
In the wizard, pick "API Gateway" as the Service.
Tick the "Read" access level checkbox.
Deploy the "Resources" submenu.
Tick the "Specific" radio button.
Click on "Add ARN"
Enter the region you deployed the service to (by default: us-east-1 - aka North Virginia)
Enter the "Api gateway resource path". What is that you ask?

Remember your endpoint's url we wrote down earlier? The resource path is the weird part between https:// and .execute-api.us-east-1.amazonaws.com/dev/hello (in my case, it was w93r25kdl0).
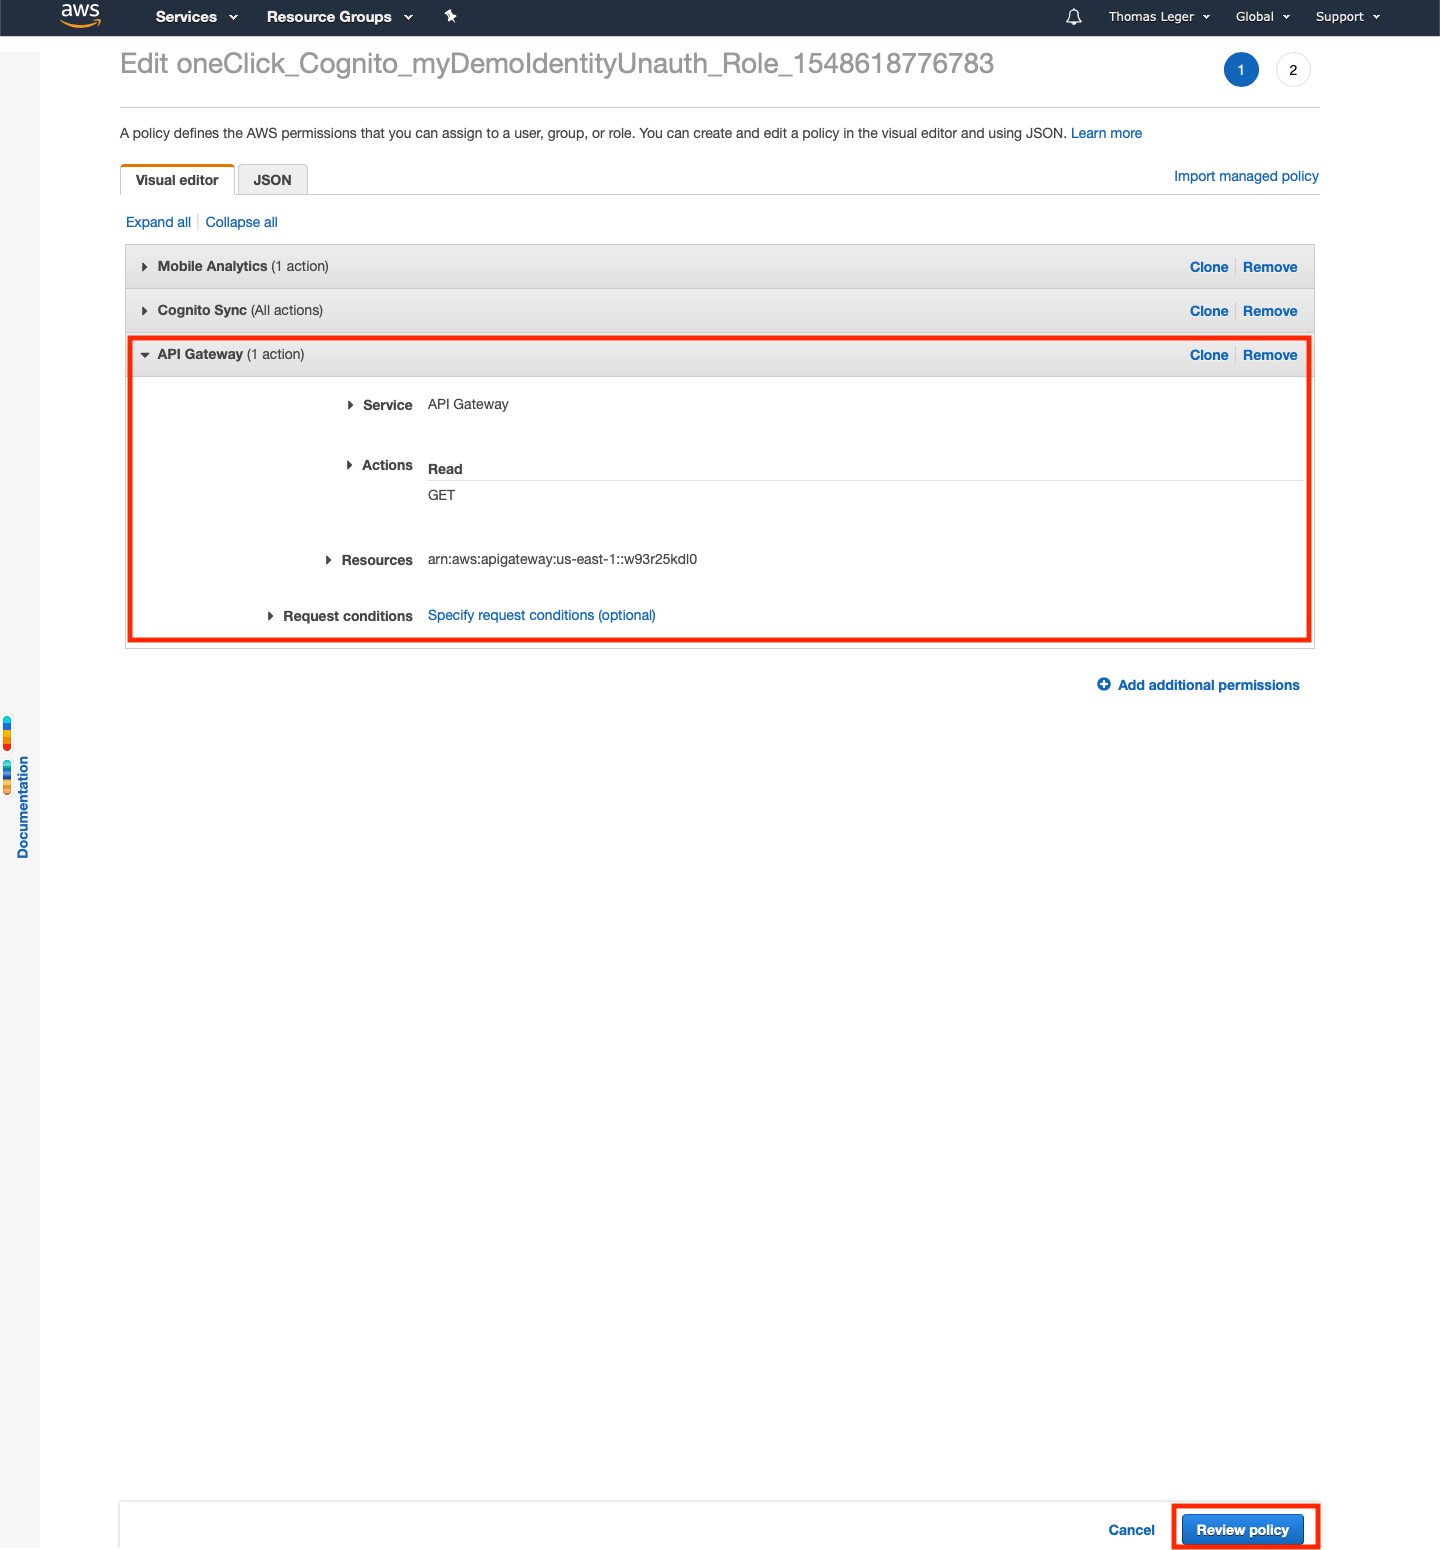
All good? Now click "Review policy", then "Save changes", and let's get out of here. I don't know about you, but I just can't stand the AWS console.
Setup your collection
Now, let's setup your collection! I use Paw, but you can use Postman, Insomnia (which is great for testing GraphQL APIs, such as AWS Amplify's, by the way), or even cURL (yes I did just put a link for more info on cURL). Whatever rocks your boat.
First, create a POST request, pointing at https://cognito-identity.us-east-1.amazonaws.com/
It'll take two headers: [Content-Type:application/x-amz-json-1.1] and [X-Amz-Target:AWSCognitoIdentityService.GetId]
The body will be a json, like the following
{
  "IdentityPoolId": "us-east-1:someAlphaNumGibberish",
  "AccountId": "yourAccountId"
}
Replace the values with yours (here's how to find your AWS Account ID).
Using cURL it would look like this:
curl --header "Content-Type:application/x-amz-json-1.1" --header "X-Amz-Target:AWSCognitoIdentityService.GetId" \
  --request POST \
  --data '{"IdentityPoolId": "us-east-1:someAlphaNumGibberish", "AccountId": "yourAccountId"}' \
  https://cognito-identity.us-east-1.amazonaws.com/
Remember to change the endpoint's region if you deployed in another AWS region
This request will get you an IdentityId we'll use you to get ourselves IAM credentials. Run it, write down the returned IdentityId
Now let's get ourselves some credentials!
It's pretty much the same request.
POST, pointing at https://cognito-identity.us-east-1.amazonaws.com/
Two headers: [Content-Type:application/x-amz-json-1.1] and [X-Amz-Target:AWSCognitoIdentityService.GetCredentialsForIdentity]
A json body
{
  "IdentityId": "us-east-1:someAlphaNumGibberish"
}
Using cURL, it would look like that:
curl --header "Content-Type:application/x-amz-json-1.1" --header "X-Amz-Target:AWSCognitoIdentityService.GetCredentialsForIdentity" \
  --request POST \
  --data '{"IdentityId": "us-east-1:someAlphaNumGibberish}' \
  https://cognito-identity.us-east-1.amazonaws.com/
Replace Run it. And we've got ourselves some credentials! Save the AccesKeyId and the SecretKey from the response's Credentials object, and let's authenticate against our previously deployed endpoint and finally get our sweet canned template reply!
So, now is why I prefer to use a more sophisticated client than cURL to test AWS endpoints. IAM secured endpoints (wether it's the one deployed on API Gateway or AWS' "native" endpoints - think AWS Lambda) require requests to be signed. Using AWS Signature v4. Which I'd really rather not do by hand.
So, using your favorite client (in my case, Paw, which has an extension for that, but in our case the built-in S3 Signature will do), Postman (here's some documentation for that), or whatever suits you best, make a GET request on your previously deployed API's url (https://w93r25kdl0.execute-api.us-east-1.amazonaws.com/dev/hello for me), sign it using your client's AWS Signature setting, extension,... (for Paw, go to Auth, pick "S3 Signature", and fill the Access Key ID and the Secret Access Key ID using the values we got previously, and make your request.
You should get a JSON answer, with a message and an input property. That's it!

Enjoy!
Now you can test your IAM authorized endpoints more easily, especially if your client offers dynamic values. Don't forget to delete all the created resources (IAM Roles, Identity Pool & the Serverless microservice)!
One More Thing...
I said I'd tell you how I figured out the endpoints URLs, as well as the requests, so here it is.
Just install aws-cli, set it up and set up your Federated Identity as we did earlier.The cli tool has commands for many AWS services, including Cognito Federated Identity. In our case, aws cognito-identity get-id which takes an --identity-pool-id parameter (your identity pool's ID), and aws cognito-identity get-credentials-for-identity, which takes an --identity-id (the value returned from get-id).
Just run these two with the --debug flag, as well the region & account-id parameters if necessary (ie aws cognito-identity get-id --identity-pool-id us-east-1:403b0542-32d0-4b3d-84d5-3ca78b391ffd --region us-east-1 --account-id yourAccountId --debug), and it'll spill the beans!
Thanks for reading, and have a great day!


Comments ()