Don't think twice: Caching AWS Lambda behind a custom domain with CloudFront
Cache your AWS Lambda functions results and make your life easier with a custom domain using Cloudfront!

If your AWS Lambda function is pretty much just running in front of some database, serving your users content that doesn't change too often (just like... live election results or webcomics!), you might want to cache your function's responses.
Caching can speed up response time (hey, your function doesn't have to run!), reduce executions count (freeing up some that concurrency limit), free up some DynamoDB capacity units, monitoring events (wether it's Cloudwatch logs, X-Ray, Thundra, Dashbird or Honeycomb, Sentry... hell, here's a full blog post dedicated to serverless observalibility tools), etc, etc, etc... and, of course, reduce costs.
Why a custom domain? First, vanity. Second, readability. Last, and definitely not least... stability. Really. Why? Because API Gateway URLs change when removing and redeploying service. And you don't want to be keeping manually track of that.

I'll assume you use the Serverless framework. Why? Because it's the sane, sensible and free (as in free beer AND open source!) thing to do. If you don't, don't worry; it works the same. You'll just have to work out how to do it through whatever it is you use, wether it's Terraform, SAM, Cloudformation (😨), aws-cli (😰), AWS's Console (😱) or something else.
Setup your custom domain / subdomain on Route 53
If you do not want to use a custom domain, you can skip this part and jump to Setup your microservice. Otherwise, keep reading!
If you know what you're doing, just go ahead and jump into the Route 53 console. It's pretty straightforward and well explained anyways.
If you have some trouble, the AWS documentation is pretty good here. Your subdomain already exists? Check out Migrating DNS Service for a Subdomain to Amazon Route 53... You're creating a new subdomain? Go have a look at Creating a Subdomain That Uses Amazon Route 53 as the DNS Service... For a whole domain, it's pretty much the same. See Making Amazon Route 53 the DNS Service for an Existing Domain for an existing domain or Registering Domain Names Using Amazon Route 53 if you're registering a new domain with Route 53.
Request your domain's certificate with ACM
Ok, domain is done! Now, let's get ourselves an SSL certificate! What does ACM stand for you ask? AWS Certificate Manager. Or Amazon Web Services Certificate Manager. You asked for it.
All right, first trick: the certificate has to be setup in the us-east-1 region (North Virginia). Why? I don't know. Maybe someone at Amazon found it great to use a hard-coded value and now they can't get around it without bringing down half the Internet? Maybe
So head over to the certificate manager's console.


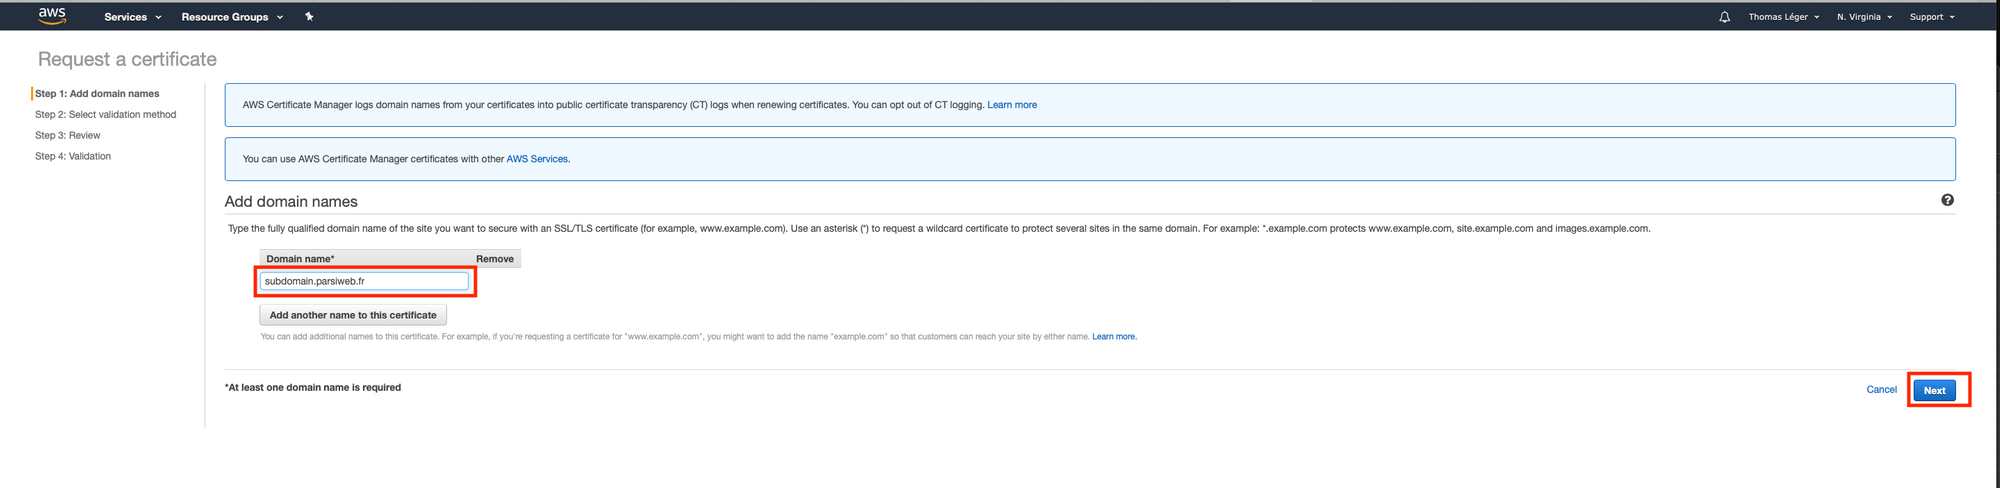

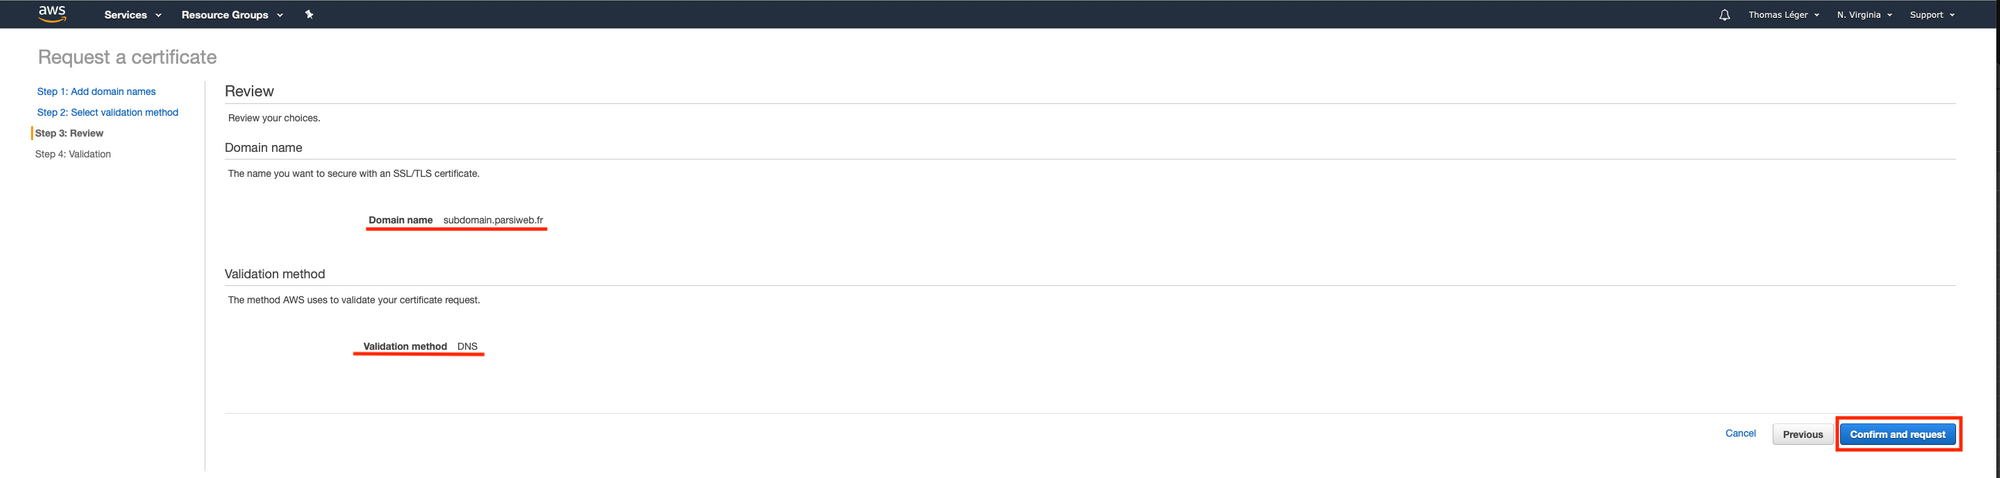

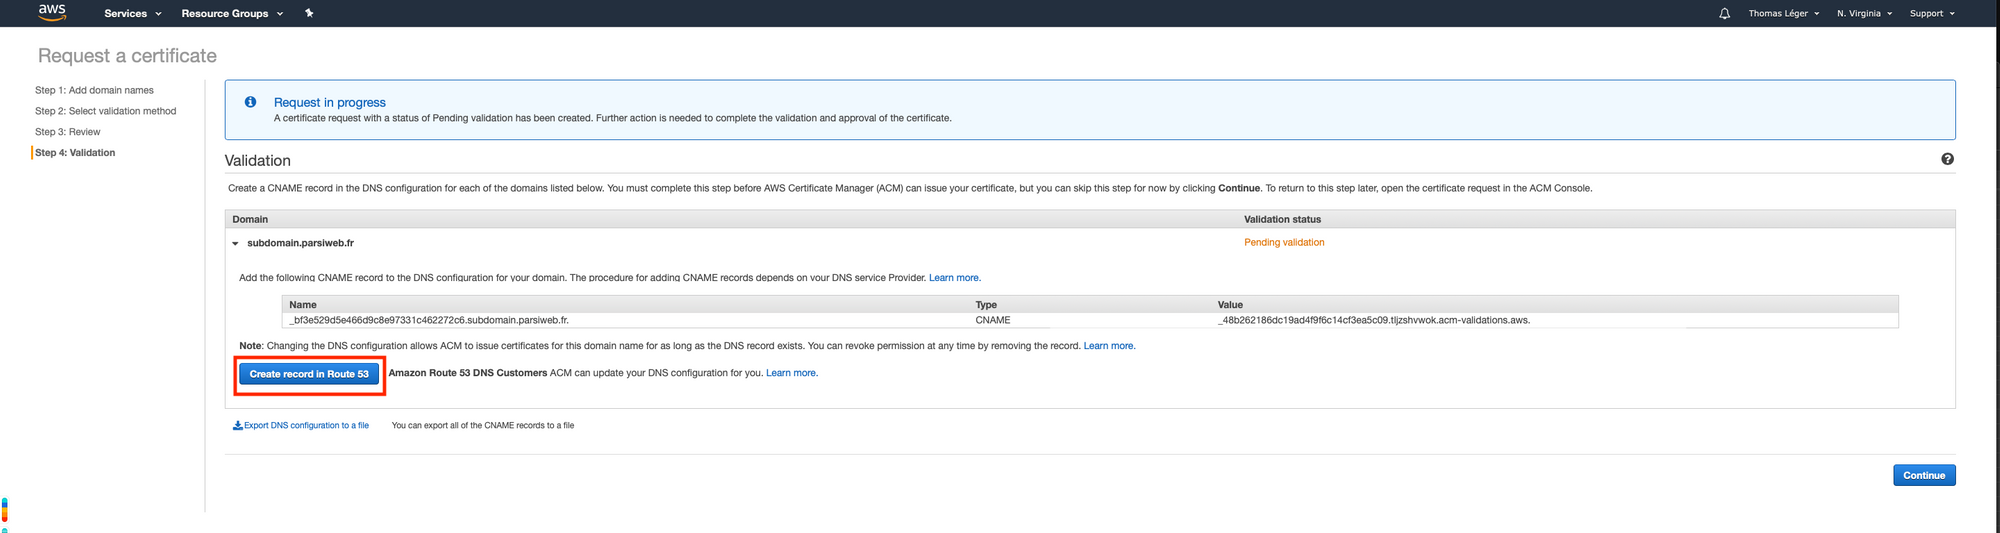
Once you've done that, click "Continue". Now we wait and refresh the page until the status goes from "Pending validation" to "Issued". It may take some time (~20 minutes). Also, keep that page open. We'll need it later.

Setup your microservice
Next, we'll setup a serverless microservice. In this case, we'll go with the default template. If you don't already have the serverless cli tool installed, go ahead:
npm install -g serverless
Then, setup the project. Open your terminal, go to your favorite stuffINeverPlannedToKeepAroundButAreStillHereTenYearsLater directory (for me it's either ~/Downloads or ~/Desktop) and set it up ! (for more info, check out the project's AWS Getting Started).
# Create a serverless Service
serverless create --template aws-nodejs --path hello-serverless
# Go to the service's directory
cd hello-serverless
You now have a nice hello world microservice waiting to be deployed. Let's setup our custom domain and caching using Cloudfront.
First, install serverless-pseudo-parameter: npm install --save-dev serverless-pseudo-parameter. It makes both our lives easier.
Open your project's serverless.yml, and add an http event. This is what will setup API Gateway for your function, and it should look like this
functions:
  hello:
    handler: handler.hell`
    events:
      - http:
          path: /
          method: get
Next, remove all the commented clutter, and add this at the end of your serverless.yml
resources:
  Resources:
    ServerlessDemoCloudFrontDistribution:
      Type: AWS::CloudFront::Distribution
      Properties:
        DistributionConfig:
          Comment: The AWESOME HELLO SERVERLESS WORLD! Cloudfront distribution
          Aliases:
            - subdomain.parsiweb.fr
          ViewerCertificate:
            AcmCertificateArn: arn:aws:acm:us-east-1:#{AWS::AccountId}:certificate/yourCertificatesArn
            SslSupportMethod: sni-only
          DefaultCacheBehavior:
            AllowedMethods:
              - HEAD
              - GET
            CachedMethods:
              - HEAD
              - GET
            TargetOriginId: AwesomeApi-aws-origin
            ViewerProtocolPolicy: 'redirect-to-https'
            DefaultTTL: 1314000
            Compress: true
            ForwardedValues:
              # Headers:
                # - "*"
              QueryString: true
          Enabled: true
          PriceClass: PriceClass_100
          Origins:
            - Id: AwesomeApi-aws-origin
              DomainName:
                Fn::Join:
                  - "."
                  - - Ref: ApiGatewayRestApi
                    - execute-api.#{AWS::Region}.amazonaws.com
              CustomOriginConfig:
                HTTPPort: 80
                HTTPSPort: 443
                OriginProtocolPolicy: https-only
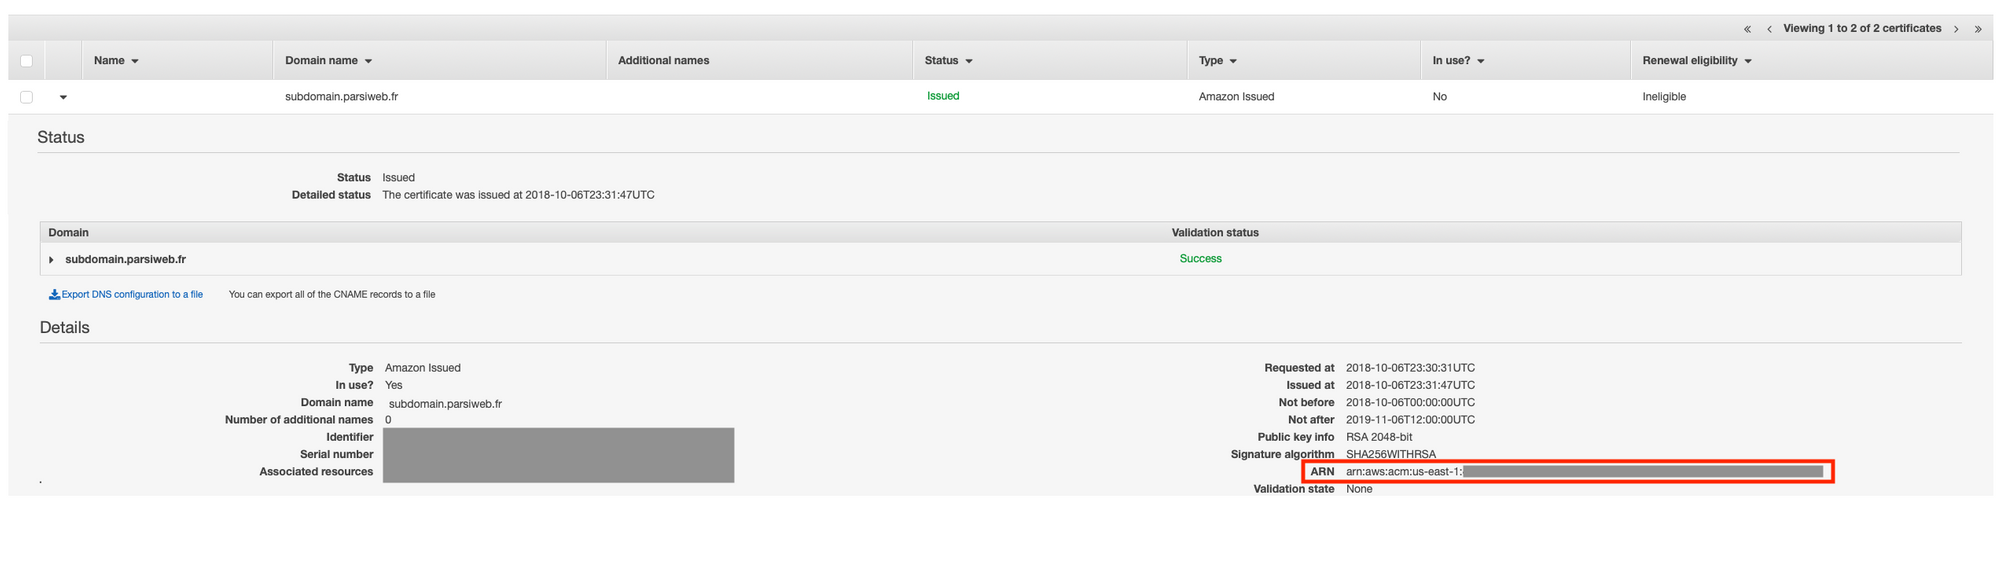
Replace subdomain.domain.tld in Aliases with your full subdomain, and arn:aws:acm:us-east-1:#{AWS::AccountId}:certificate/yourCertificatesArn in ViewCertificate's AcmCertificateArn with your certificate's arn (remember when I told you not to close that tab earlier? That's why)
What did we just add? A Cloudfront distribution! Oh, you want to know what it is that you just copy-pasted? Of course you do. If you don't, you should. If you already know, props to you, go straight to Deploy!
ServerlessDemoCloudFrontDistribution it's our Cloudfront distribution's name, it's what will show up in the AWS console
Aliases: defines which domains will be allowed to forward to the Cloudfront distribution. It's an array
ViewerCertificate: it defines the certificates your cloudfront distribution will use for SSL. There are multiple possible values for the certificate type. In our case it's an AWS Certificate Manager certificate, so we use the ACMCertificateArn key, with our certificate's arn as the value.
Since we use ACMCertificateArn we must also specify an SslSupportMethod (cf the AWS Documentation). Since we don't want to pay any additionnal fees, we'll specify sni-only. The other choice, vip, uses dedicated ip adresses.
DefaultBehavior ! Here you specify which HTTP method are allowed (AllowedMethods) and will be cached (Cached Methods). They require specific sets of values and not every combination will be considered valid.
TargetOriginId: We'll see this later.
ViewerProtocolPolicy: We want to use https and redirect http requests to https, so we'll use redirect-to-https. There are other possible values.
DefaultTTL: your cache duration in seconds. Here it's set to 365 days, but you can set it to 5 seconds. 0 disables it.
Compress: self-explanatory. Save bandwith. Speed-up requests. Compress.
Forwarded-Values: Oh, that's a fun one! Here you define which headers and QueryString parameters are forwarded to your origin (here your Lambda function).
Keep in mind: any forwarded value is used in the cache-key. Not sure what that means? If you use a timestamp as a header, such as X-Amz-Date (used in Signature 4 signing), your requests won't be cached. Ever. Each time forwarded query string paramaters or header changes, it will be considered a new request and be forwarded to the origin.
Enabled: well, it better be.
PriceClass: I picked the cheapest one, PriceClass_100. There are other options, here's some help on how to pick one.
Origins ! My favorite. That's where the magic happens. Where we define the TargetOriginId we saw just earlier. Where we tell Cloudfront who it'll cache!
First the Id (which is the value you'll have to match in TargetOriginId). Can be whatever you want.
Next, the Domain Name. Here I'll be doing some Cloudformation magic to join the function's API gateway id to API Gateway's domain. But if you want you could hard set your domain (bad idea in our context since API Gateway URLs change when removing and redeploying service).
Finally, CustomOriginConfig. Just some http port settings and protocol settings; pretty self-explanatory too.
Deploy
Your serverless.yml should now look like this:
# Welcome to Serverless!
#
# This file is the main config file for your service.
# It's very minimal at this point and uses default values.
# You can always add more config options for more control.
# We've included some commented out config examples here.
# Just uncomment any of them to get that config option.
#
# For full config options, check the docs:
#    docs.serverless.com
#
# Happy Coding!

service: hello-serverless

provider:
  name: aws
  runtime: nodejs6.10

plugins:
  - serverless-plugin-optimize
  - serverless-pseudo-parameters

functions:
  hello:
    handler: handler.hello
    events:
      - http:
          path: /
          method: get

resources:
  Resources:
    ServerlessDemoCloudFrontDistribution:
      Type: AWS::CloudFront::Distribution
      Properties:
        DistributionConfig:
          Comment: The AWESOME HELLO SERVERLESS WORLD! Cloudfront distribution
          Aliases:
            - subdomain.parsiweb.fr
          ViewerCertificate:
            AcmCertificateArn: arn:aws:acm:us-east-1:#{AWS::AccountId}:certificate/yourCertificatesArn
            SslSupportMethod: sni-only
          DefaultCacheBehavior:
            AllowedMethods:
              - HEAD
              - GET
            CachedMethods:
              - HEAD
              - GET
            TargetOriginId: AwesomeApi-aws-origin
            ViewerProtocolPolicy: 'redirect-to-https'
            DefaultTTL: 1314000
            Compress: true
            ForwardedValues:
              # Headers:
                # - "*"
              QueryString: true
          Enabled: true
          PriceClass: PriceClass_100
          Origins:
            - Id: AwesomeApi-aws-origin
              DomainName:
                Fn::Join:
                  - "."
                  - - Ref: ApiGatewayRestApi
                    - execute-api.#{AWS::Region}.amazonaws.com
              CustomOriginConfig:
                HTTPPort: 80
                HTTPSPort: 443
                OriginProtocolPolicy: https-only
Looks good? Now comes the easiest part: deployment. Pretty much just
serverless --deploy
Yeah, that's it. You'll need to be patient however. Cloudfront takes aaaaaages to deploy the first time (usually around 20 minutes).

Update your domain record
The wait is over? Great. Head back to Route53 on AWS console's.
Test it
Use your favorite REST Api tool, wether it's Postman, Paw or curl.
Set the request type to GET, use your.configured.domain.tld/dev as the url(the serverless framework deploys by default on the dev stage, hence the /dev path). Hit send, or enter, or whatever your favorite tools uses. It worked? Great. Of course it did. Now, go check the response headers, more specifically the X-Cache header.
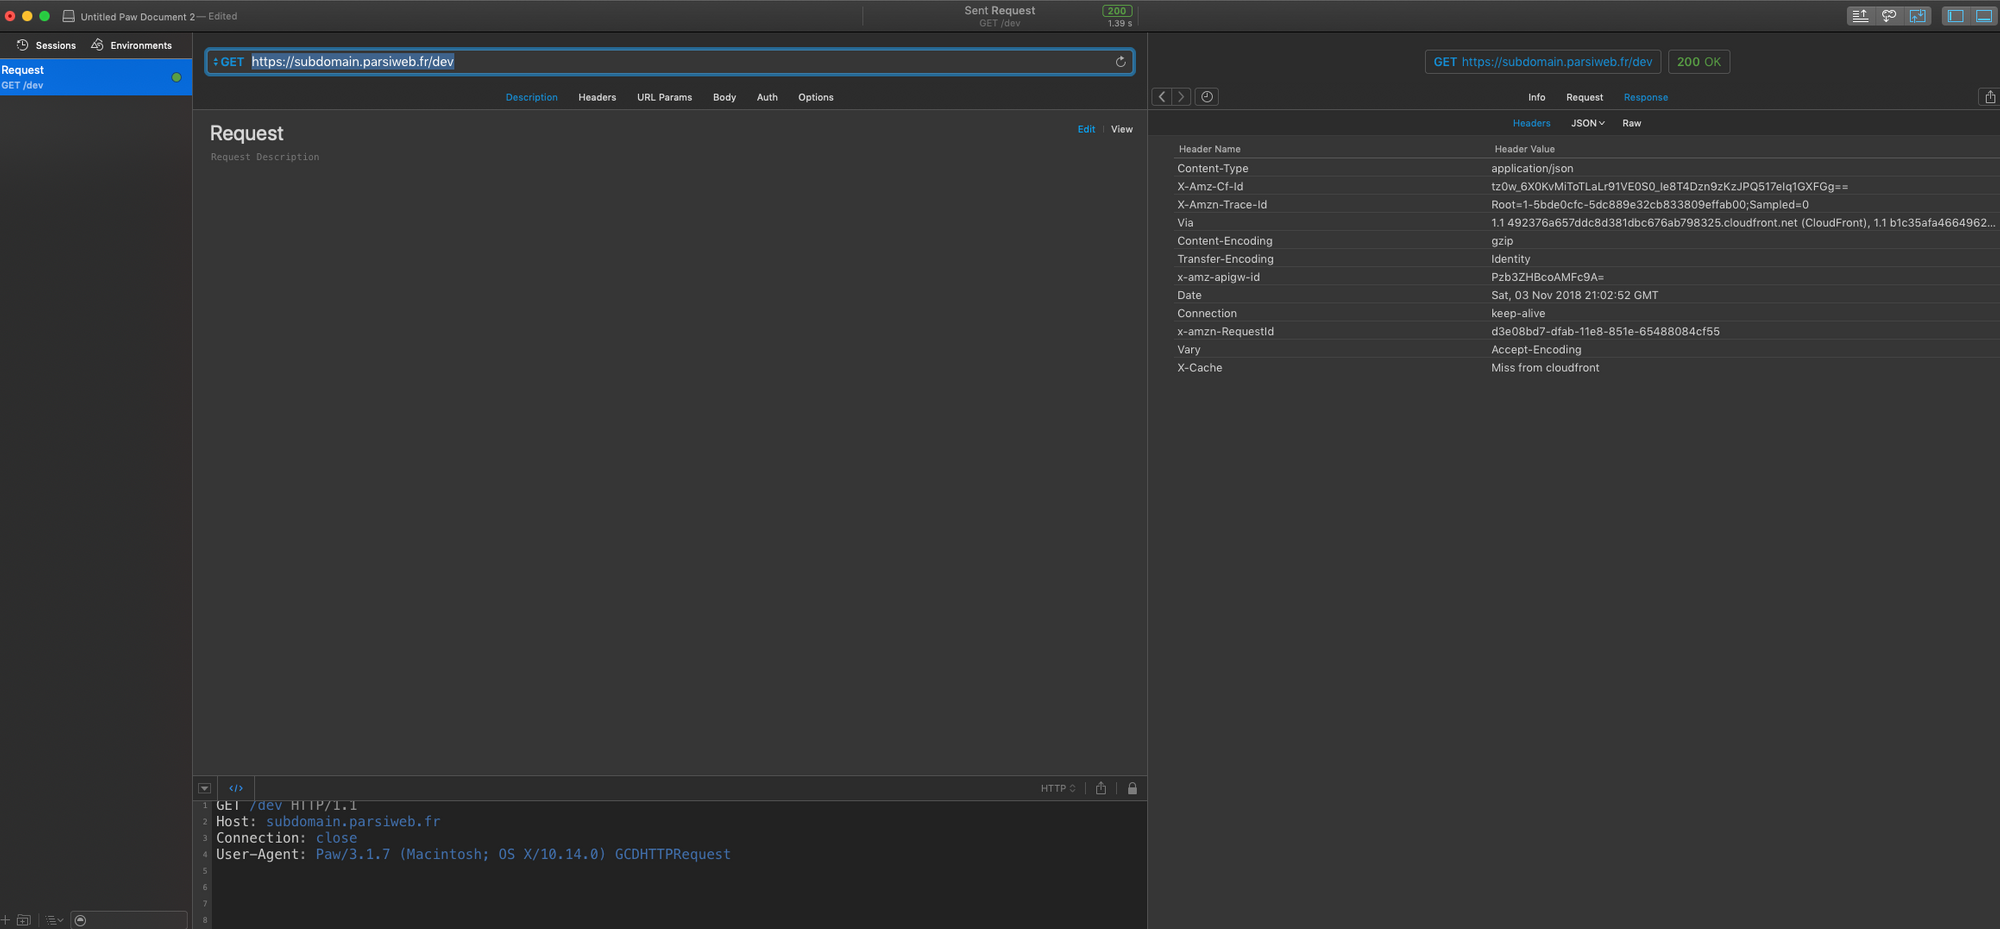
Now, repeat it.
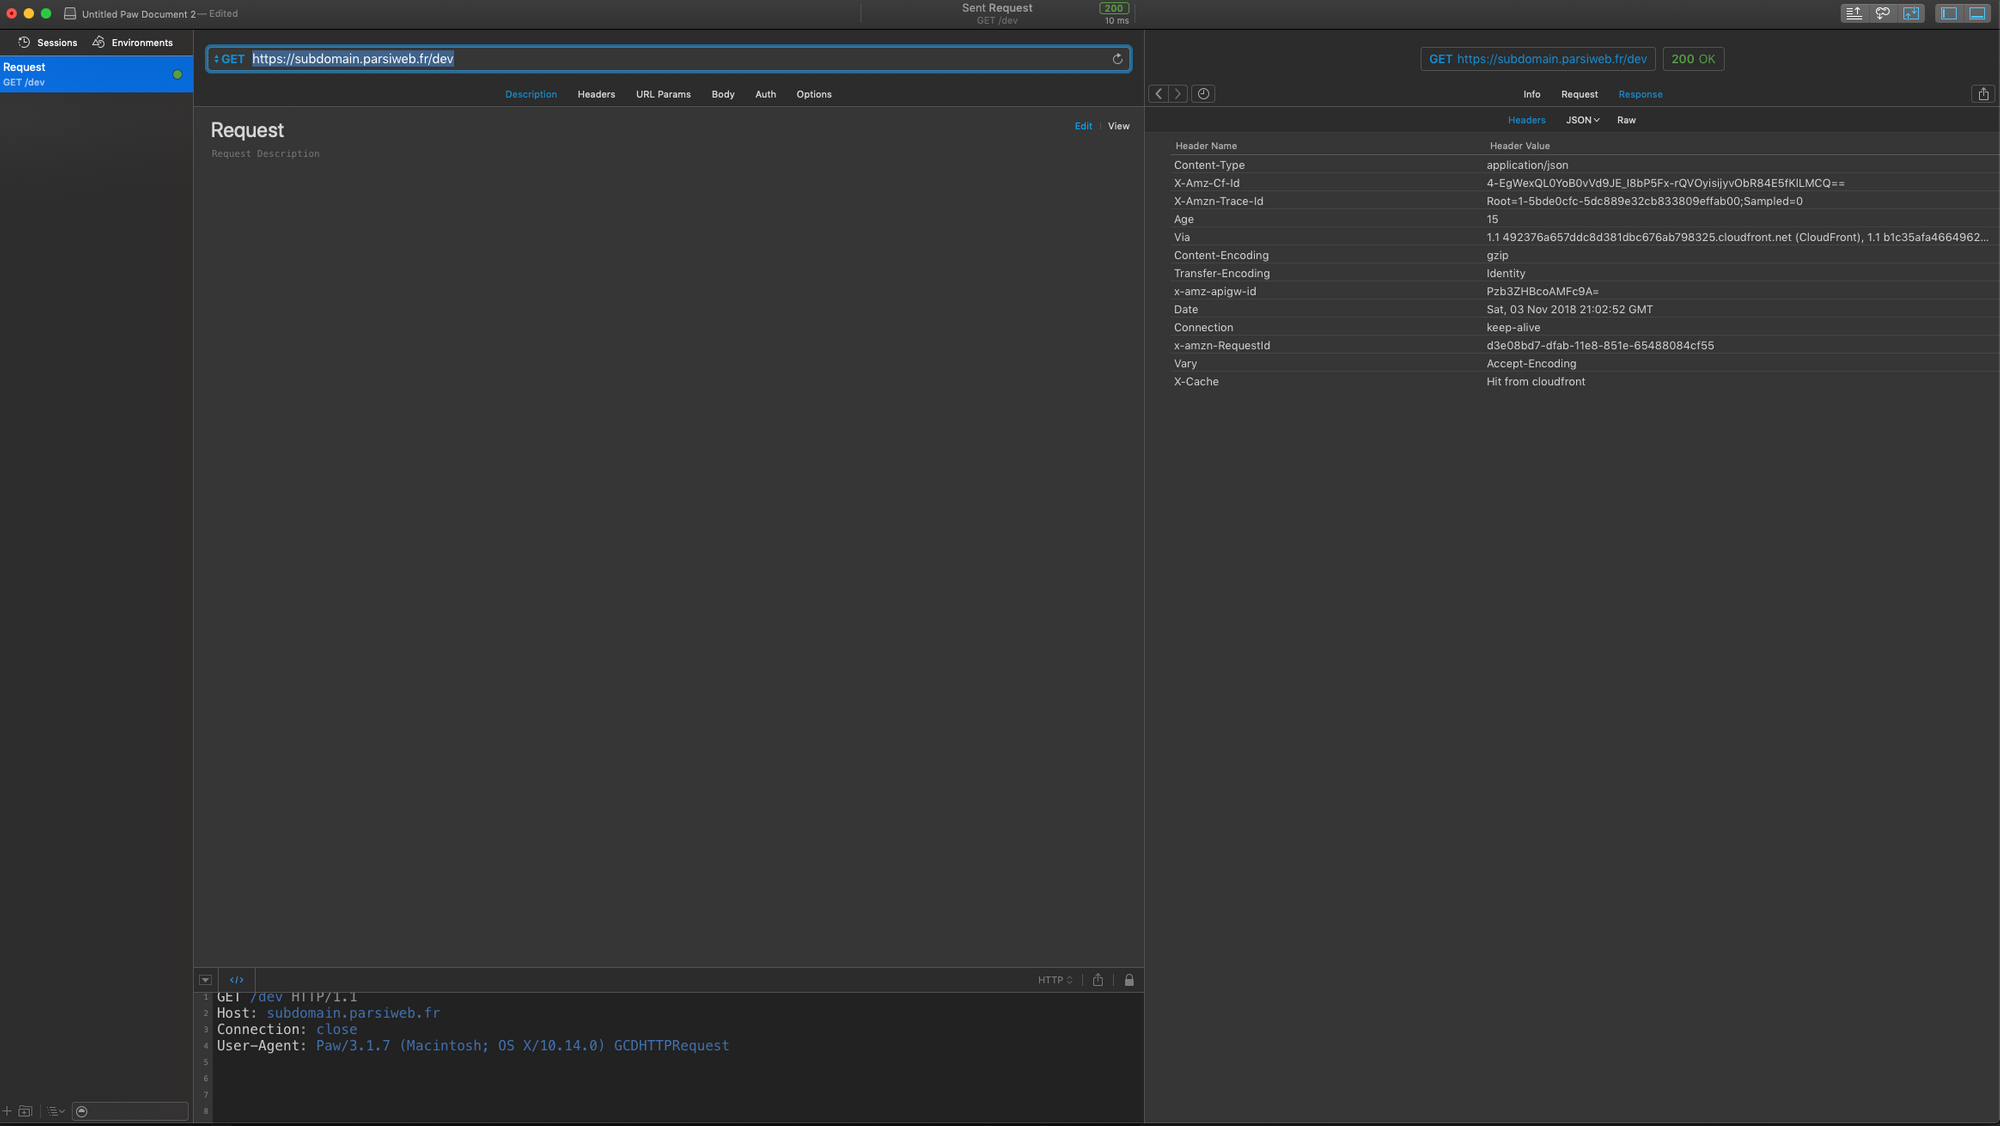
Done! Finally! In the end, it really just is the Old Engineer and the Hammer story all over again (fun fact: the first time I heard this one, it was with a computer and an IBM guy).
Parting words

You can use this setup to "secure" and "force" API Gateway usage with Cloudfront, protecting your Lambdas, concurrency limits and... bank account (part 1 and part 2); more on this later.
You can also use it to directly proxy Lambda through Cloudfront (but you'll lose caching capabilities, as far as I know. And I've tried). I'll also dive deeper into this one later on.
I also have to warn you once more regarding the ForwardedValues property in the DefaultCacheBehavior settings. It can take both Headersand QueryStringparameters, and defines what will be forwarded to your origin (here, your Lambda function) instead of getting stripped away by Cloudfront. Pretty neat, right ?
The thing is, every forwarded value is used as part of the cache-key, meaning that two nearly identical requests, for the same content, differing only by, say... their Authorizationor x-amz-dateheaders... will be treated as two different requests. The thing is, AWS Signature 4 relies on a date timestamp (which, by definition, changes all the time), so... even for the same user, if you use IAM as your API Gateway's authorizer, you won't be able to cache the requests.
Also, things will work quite differently if you use Cloudfront in front of an IAM secured API Gateway enpoint.
First of all, you'll need to sign your request, for your API Gateway endpoint. So the host in your canonical request will be blablasomethingwhatever.execute-api.your-region.amazonaws.com instead of somethingelse.cloudfront.net.
Next, you'll need to add a host header, matching your API Gateway endpoint's host. Here's a screenshot from Paw

Last but not least, you'll have to make sure all IAM signature headers (Authorization, x-amz-date, x-amz-security-token if you use Cognito Federated Identities, and host) are properly forwarded to your origin by Cloudfront. But Authorization, x-amz-date, x-amz-security-token can't be specifically forwarded. You'll have to forward all headers, which can be done by setting the forwarded headers to "*" in theForwardedValues Headers property of the DefaultCacheBehavior.


Comments ()